Easy DIY Media Unit Doors Using IKEA Rodeby Armrest Trays
Open TV stands are like clear glass light fixtures: gorgeous in theory, dysfunctional in reality! Housing a menagerie of books, games, cords and accessories, media units should most definitely have doors. After growing tired of the clutter in our open unit, I turned a couple of IKEA Rodeby armrest trays into some (very) simple doors using just finishing nails, super glue, and leftover door pulls.
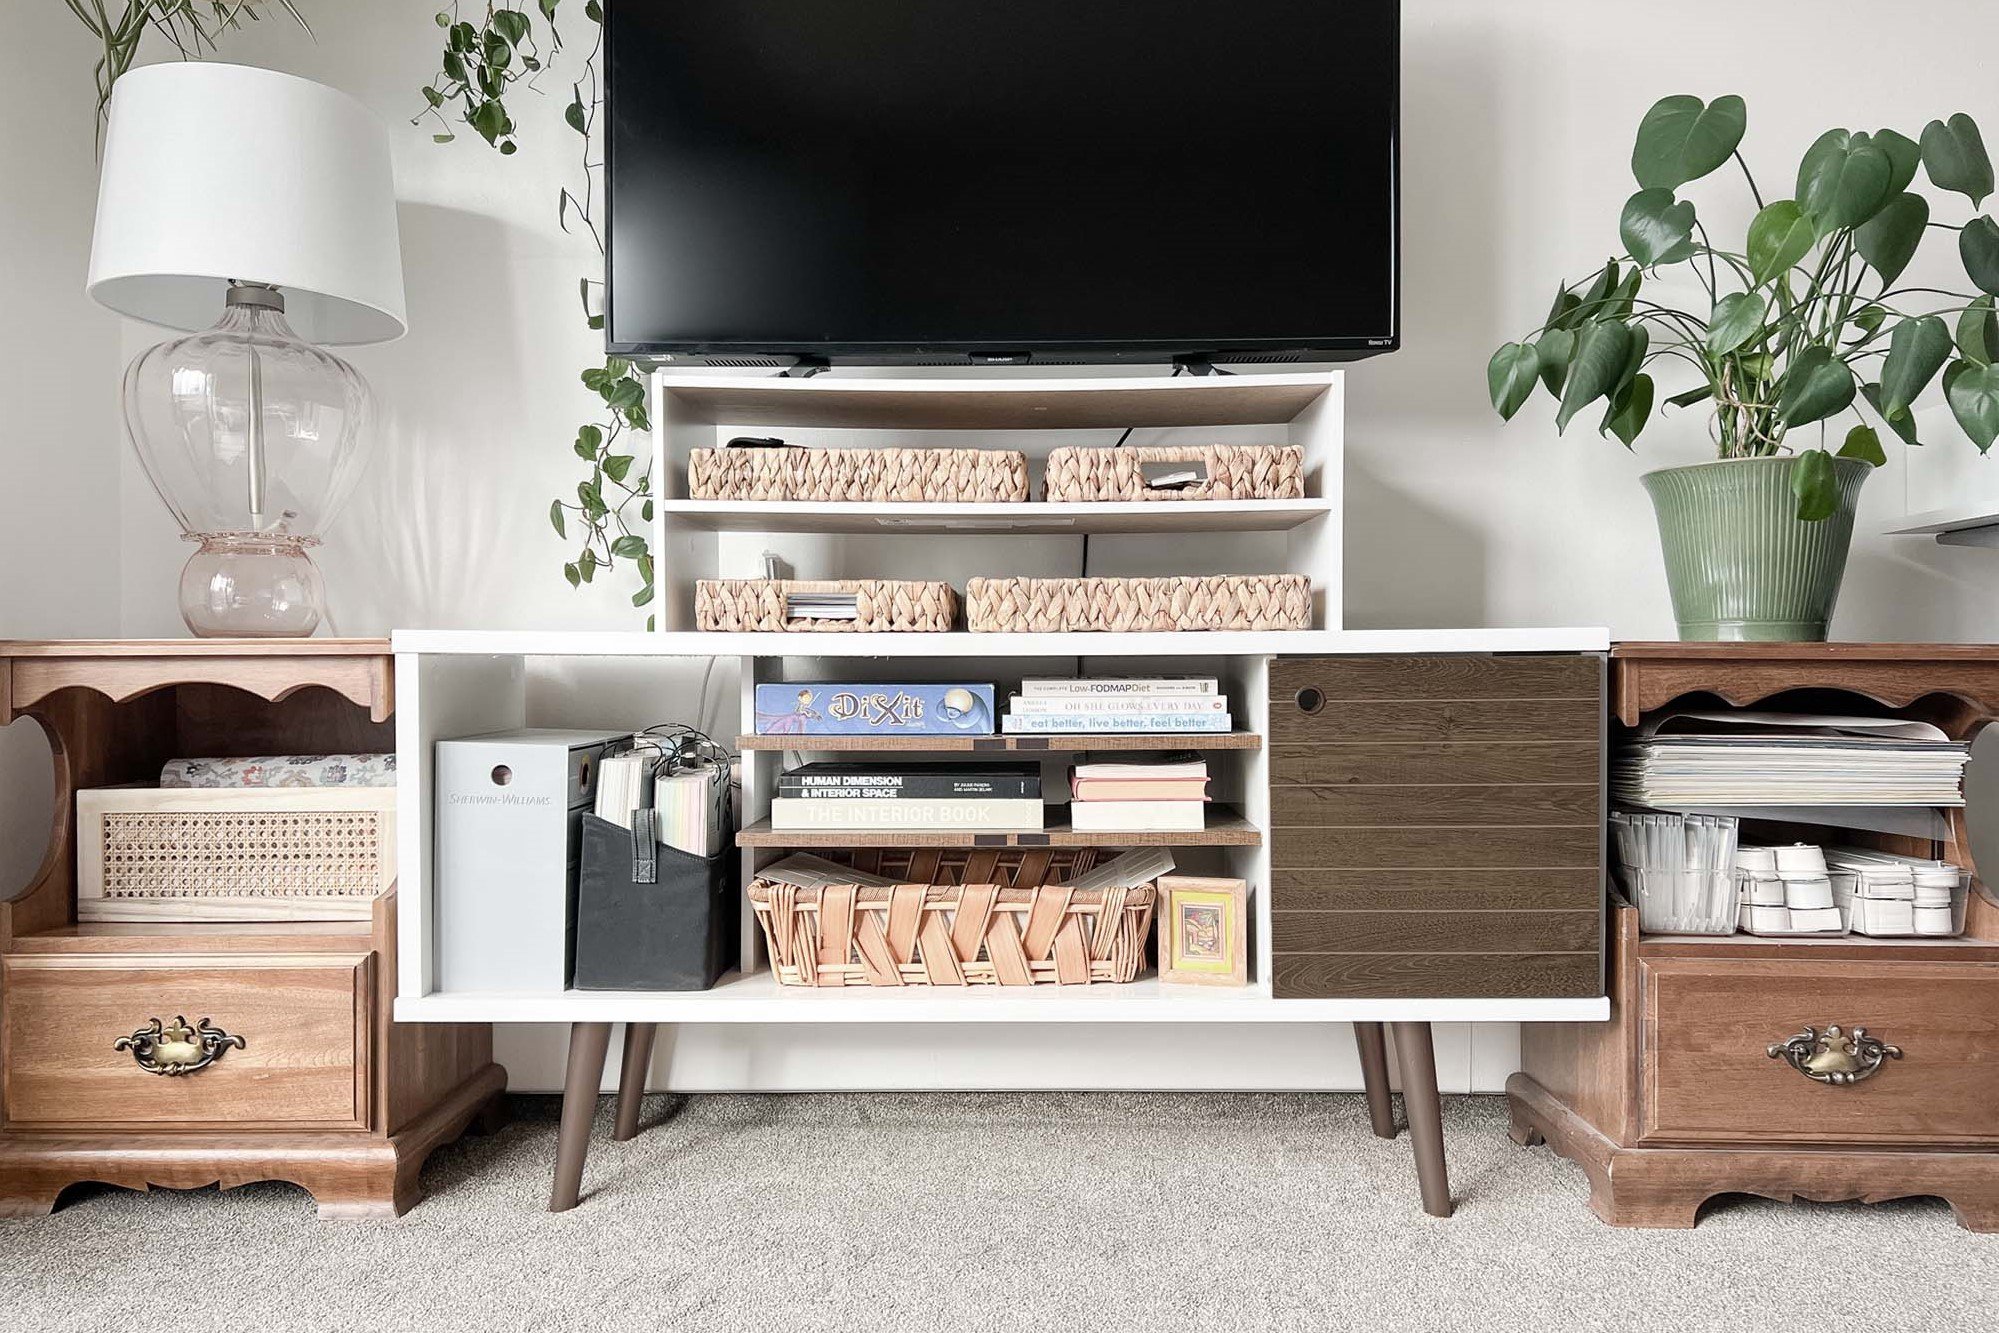
Before - The Open TV Stand
A few years ago, we got this mid-century TV stand and quickly regretted it. No matter which baskets I used or how nicely the books were stacked, I was always bothered by the busy contents of the shelf.
One evening while staring idly at my nemesis, I realized the height of the opening was about the width of an IKEA Rodeby armrest tray. #lightbulbmoment! So I removed the original door, painted the legs, drilled four tiny holes and added the Rodebys! Details below 😊
During - The Rodeby Strategy
After deciding proper hinges and doors were too expensive and complicated, I opted for the easiest and jankiest solution possible: a nail in a hole.
I super-glued some finishing nails to the backs of the Rodebys — one at the top and bottom on the side of each “door” — then drilled small, coordinating holes into the unit.
It was important to carefully measure both the position and depth of the holes, so both the top and bottom nail were aligned, and so the door would sit at the correct height.
The top hole is deeper to accommodate the “installation” of the door, and it doesn’t have to be exact. But the bottom hole must be drilled precisely to ensure the door sits at the desired height.
TIP: You can monitor your drilling distance by wrapping a piece of tape around your drill bit at the point you need to stop!
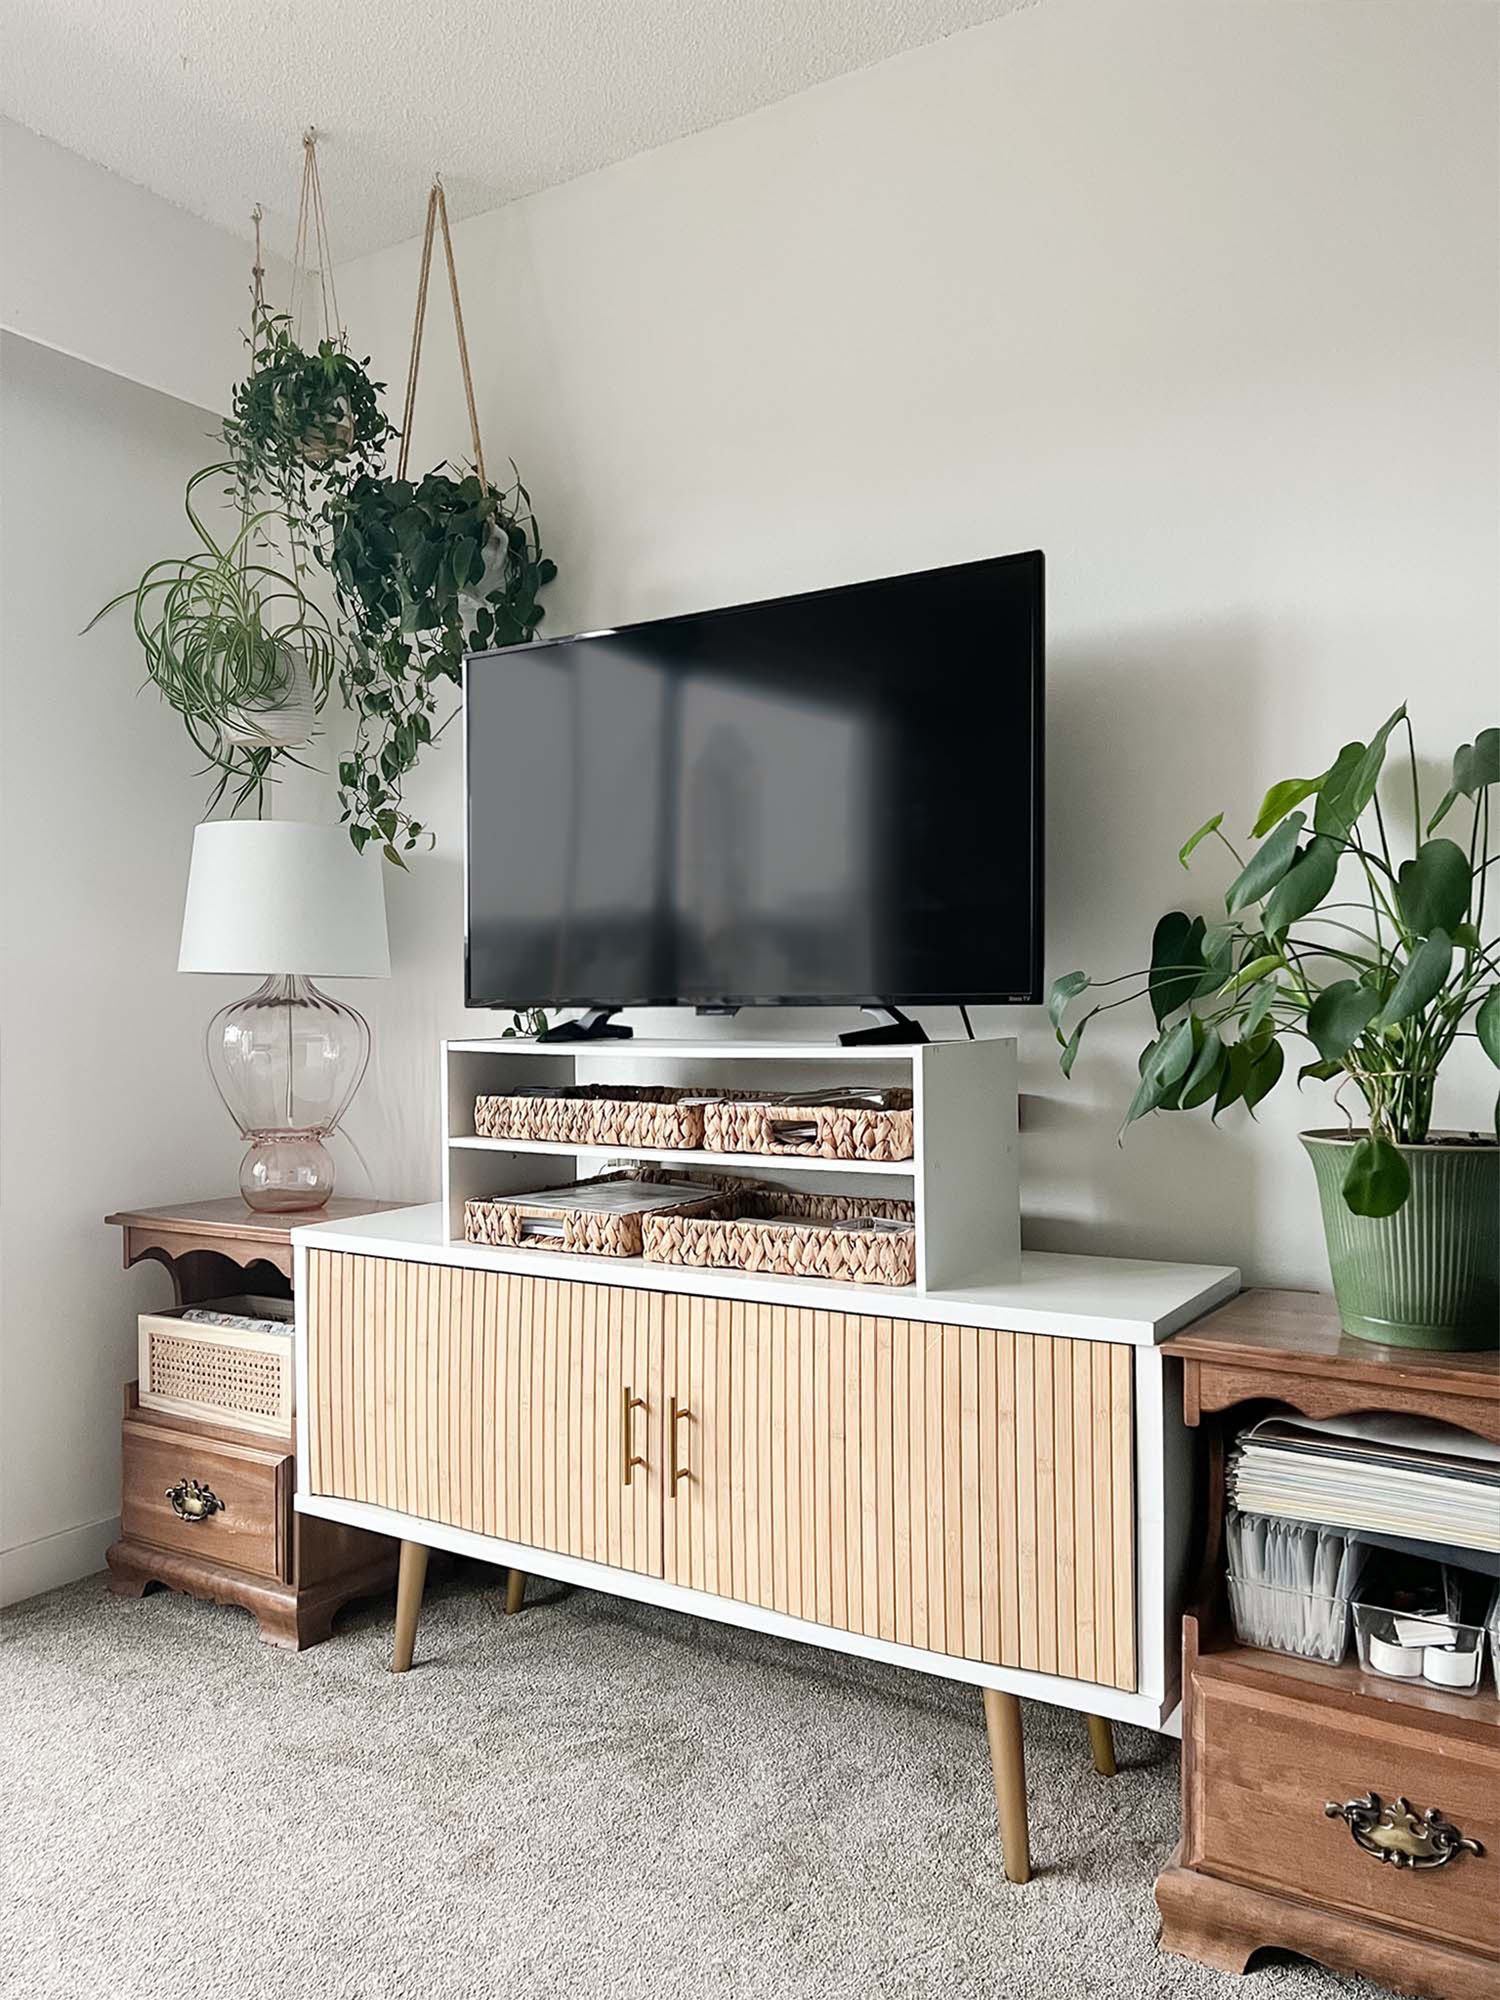
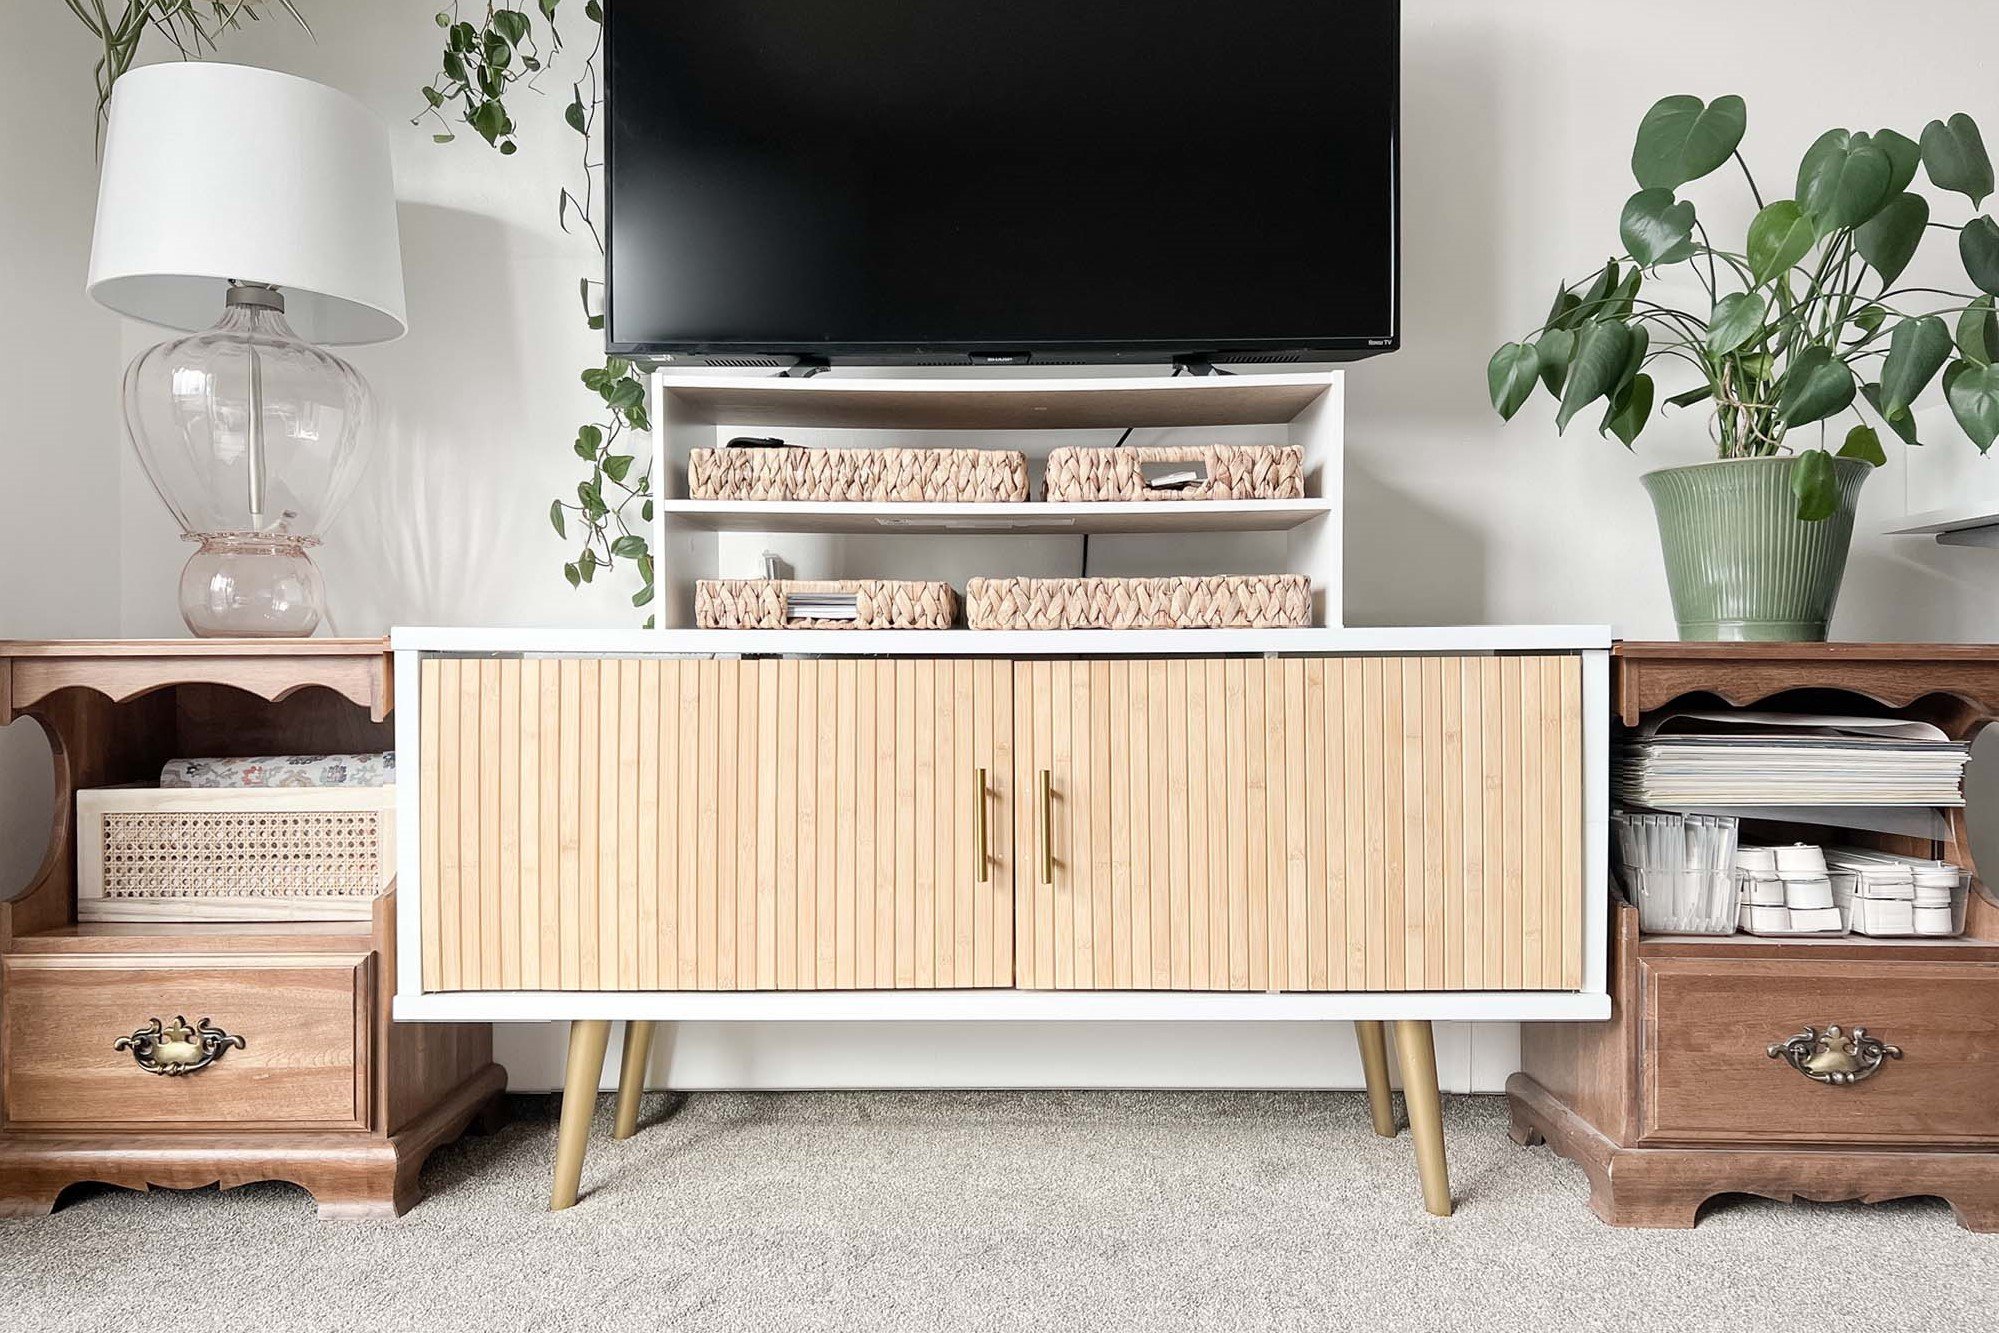
After - A Revamped Media Unit!
I had a couple left over door pulls from another project, so I painted the legs gold to match, added the pulls, and attached some magnets to the inside of the doors / shelves to hold the doors closed. This little project was super inexpensive and only took a few hours, but it completely transformed our TV stand!
I’m convinced the humble Rodeby armrest is a treasure trove of DIY possibilities! I love how this TV console project turned out, and I hope you feel inspired to find design magic in unsuspecting places. ✨
Related Articles
Front doors are meant to be colourful! See how a pretty coral front door breathes new life into this historical lake-front cottage.
If you have a stretch of wall that needs some love, or if you already have a sideboard and don’t know how to style it, these few rules of thumb can help guide your affordable decorating project! Find out how Caitie created this sideboard vignette for under $300.
As is often the case in design, there is a bit of a formula for creating a great bedroom. Whether you’re sprucing up your own room or decorating a guest space, use these 10 tips to design a bedroom you’ll love!
Are you reluctant to purchase home decor online, worried it might not turn out as expected? We’ve all be burned by a bad online purchase, but online shopping majorly broadens your design horizons and there ARE a few ways to dramatically increase your chances of success!
Are you wondering how to update your bedroom for under $1000?This may sound like a lot of money, but new bedding alone can cost upwards of $200, most rugs are in the $300-$400 range, and the minute you say “window treatments,” well, that’s another few hundred right there. But with a little patience, persistence, luck, and creativity you can stretch your budget a long way and create a whole new feel!
Open TV stands are gorgeous in theory, but an eyesore in reality. Housing a menagerie of books, games, cords and accessories, media units should definitely have doors! Find out how a couple of IKEA Rodeby armrest trays became some (very) simple doors using just finishing nails, super glue, and leftover door pulls.
Are you wondering where you can find affordable art BESIDES IKEA? Well, I have good news! Digital, printable artwork has opened up a whole new world of affordable decor, making wall art more versatile and accessible than ever! You can get beautiful results at a FRACTION of the price you’d otherwise pay. Seriously, digital printable art is a TOTAL game changer!
Do you want to cut down on clutter and purge your home but don’t know where to start? Performing big cleanouts is a daunting task, but it CAN be done methodically and successfully! This post breaks down the purging process to help you declutter and organize your home - the foundational first step of good interior design.
Home organization revolves around one simple commitment: specify a place for everything, and keep it there. Many articles online discuss how to keep a clean home, which is related but different. Getting organized comes first, so if you’re ready to take the plunge, follow these three steps to help you GET and STAY organized!
Is your tupperware drawer a chaotic mess? Would you like to transform it into an organized storage experience!? In this post, we discuss how to improve and maintain your food storage situation by purging, refreshing, and properly organizing your containers and lids.
Wall sconces are one of the best ways to diversify your lighting, adding mood & atmosphere to your rooms. They lend a flare that makes any space feel special, and thanks to a growing number of affordable plug-in options, sconces are more DIY- and renter-friendly than ever! Read on for a list of gorgeous and affordable plug-in sconces that are available in Canada.
Learn how an underutilized storage shed was turned into a comfortable, functional sleeping space at the lake! This budget makeover took advantage of existing, pre-owned, and discounted items, resulting in a simple and affordable transformation in just one afternoon.
Does your little kitchen not have enough counterspace? Learn how to extend your kitchen by adding another work surface, utilizing vertical storage, and maximizing your additional storage space!
Learn how to make the MOST of your small kitchen, by purging what you don’t need, utilizing vertical storage, and extending your usable counter space. These simple design ideas can help improve the functionality of any little kitchen!
This post explains how to extend your little eating area for guests by utilizing convertible furniture. Turn a table for two into a dinner for four in just a few simple steps!
This post explains how to create a cute little eating area from an otherwise unusable stretch of kitchen by defining the space, choosing versatile furniture, and adding some functional styling!
Hi! I’m Caitie, and I love sharing thoughtful and practical design advice to help you make your home more comfortable, functional, and beautiful.
If you find these posts helpful, sign up here to receive practical and resourceful design advice straight to your inbox!
If you find this design advice valuable and you’re able to leave a token of appreciation, I am deeply grateful. Thank you for your support!
Welcome to Design by Caitie, where we make our homes more functional, comfortable, and beautiful on a budget.
If you run an Airbnb, Vrbo, or other short-term / long-term furnished rental, here are 8 easy and affordable ways to improve your space and boost your reviews!